Since starting my woodworking hobby and journey, I have come to appreciate the differences and variability in the wood itself. This has led to multiple hours spent watching milling videos and while I do not have the space for a full mill set-up, the idea of milling a small log to lumber was intriguing.
I recently was at a local park and the conservation department had done some tree thinning. There were multiple small logs (~8-12″ in diameter and about 40-50″ long) that were in a pile by the parking lot. I decided to take a few, not knowing the wood species, with the thought that I could mill it up or at least get some firewood.
The two logs I grabbed were each about 42″ long and one was 10″ wide and the other was 8″ wide with a small crotch at one end splitting evenly to two 4″ wide branches. These logs sat in my driveway for about 3 weeks before I started the milling process, which I have detailed below. I spent some time researching online what type of wood I had collected – my best guess is this is black cherry based on all the information I could find. Shoutout to the Missouri Conservation Department for the available resources for tree / wood ID, including this PDF Book called Missouri Woods
The Milling Process
Step 1: Debark the Log
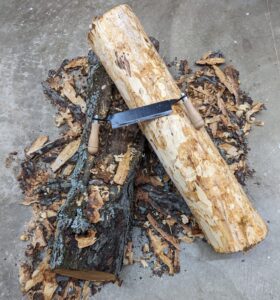
While this step is not necessary, from my research it seems this may help with more even drying and less warping of the wood. I have no plans to use these boards with a live edge so I decided to debark it.
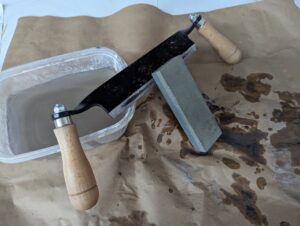
I used this draw knife from amazon. It came very dull and required about 20 minutes of sharpening – but once I got an edge on it, it worked very well. I was able to debark the larger of the two logs in about 30 minutes.
Unfortunately, when in the process of debarking the second log with the crotch, I encountered a large number of ants. I did not want to risk any wood / house contamination with the ants so I discarded the second log and focused only on the one good one.
Step 2: Mill the Log
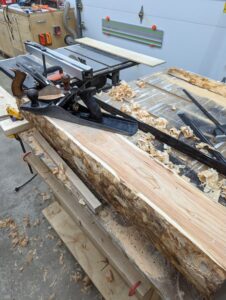
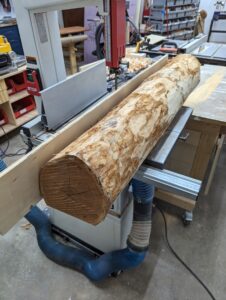
First I planed a flat reference surface to run on the bandsaw table. I then attached a sacrificial piece of 1/2″ plywood to use as a second reference surface against the bandsaw fence.
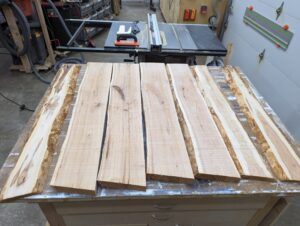
I made an initial cut of 3/4 inches, then milled the middle of the log at 1.125″ in depth, and finally made two more 3/4″ cuts at the end of the log.
I picked these dimensions as I expect to lose ~25-33% of the thickness in the drying process and I want to have 3/8″ and 3/4″ material to use when the wood is dry.
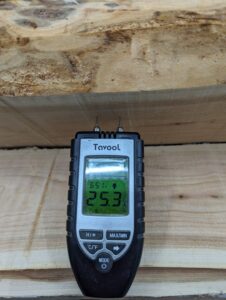
The final milling step was to take a moisture reading of the wood when it was wet. The wood immediately after milling was 25.3% moisture content.
The wood needs to be ~20% of the average relative humidity in order to be considered dry. In Missouri, this means that I am aiming for somewhere between 7-9% moisture content before I can work with it.
Step 3: Sticker and Seal for Drying
The final step step was to prep the wood for drying while trying to prevent or minimize any complications of the drying process to that it will yield the most usable lumber.
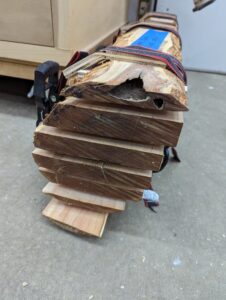
I cut the 1/2″ sacrificial plywood piece into 1″ wide strips and then used these as stickers between the milled boards to allow for airflow. I placed one stick every 16″ or so along the length of the milled boards.
I then used some ratchet straps to tightly bound the log together. This will hopefully provide some “clamping pressure” so that the boards do not cup or twist as they dry. I plan to check the boards every couple months and tighten the straps as needed when the wood shrinks from drying.
I sealed the ends of the boards with my own beeswax / carnauba wax / and boiled linseed oil blend – this will slow down moisture exchange through the end grain and hopefully minimize splits and cracks from forming or worsening (there were already some small ones when I started milling)
Now all that is left to do is wait. I plan to let the wood dry for at least 12 months and then will start measuring moisture content. I have an idea of what I want to make with the lumber, but that will be for part 2 of Log to Lumber.